|
  |
Usage: You can use Cap04 with Mach3 in 2 ways. 1. You can use as a stand alone THC in Plasma or Oxy-Fuel Cutter applications 2. Together with voltage controlled THC as a IHS (Initial Height Sensor), and Capacitive Limit Switch in Plasma Cutter applications.IN POSITION and TOUCH outputs can be used
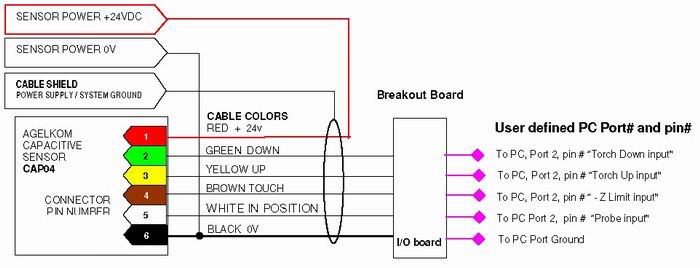
Connection: Sensor connection made via parallel port and requires 3 or 4 inputs. You can use THC UP and THC DOWN inputs for controlling the height by capacitive sensing.
Also connect.Cap04 IN POSITION output to the Probe Input shown below.
Connect Cap04 TOUCH output
to
the – Z limit
switch in voltage controlled height sensing applications Macro: You need simple macro for M3 (or M03) command . It could be easily edit or create in VB editor or simply copy and paste. Please call for the latest Macro codes. Dim PierceHeight, PierceTime, Z_Min_Height, Z_Pos
G Code You don't need cutting height or piercing height in your cam software. Delete ALL Z values after M3 command until M5 present. You only need retract level ( Z ) for Torch moves up between cuts.
Sample G Code G21 (Units: Metric) m30
Connection diagram of CAP04 with Mach3 shown below
MACH3 Configuration:
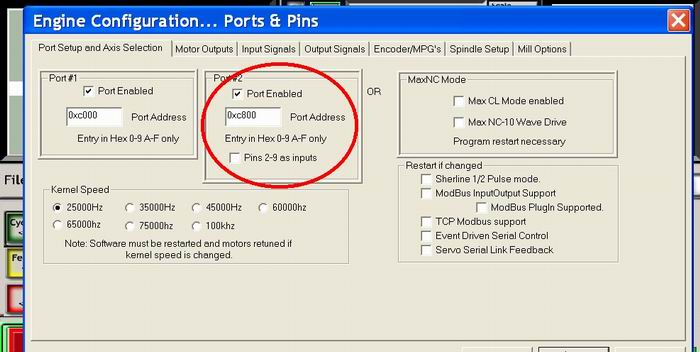
1. You need 2. Port LPT input on your PC and enable it. Address may vary.
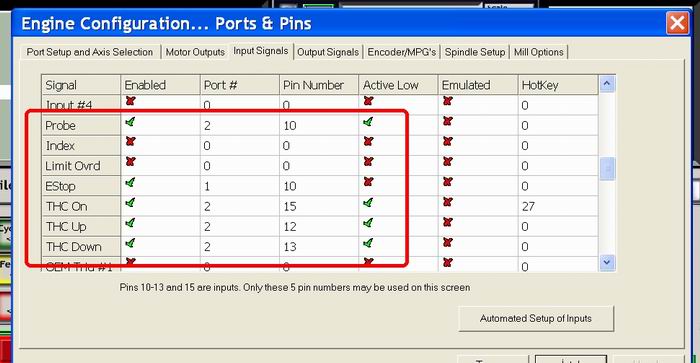
2. Configure 2. Port inputs Config>Ports&Pins>Input Signal>Enable THC ON (Arc Ok) , THC UP, THC DOWN and PROBE inputs Note: THC ON must activated for X/Y movement, if you have not such output, enabled it continuously with jumper or reversed Active Low selection.
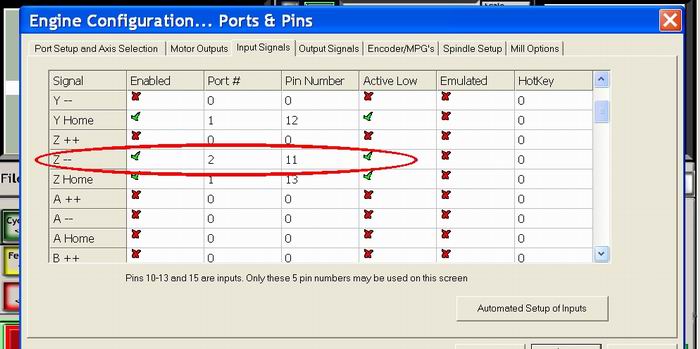
3. Configure -Z Limit Switch input. (This may not require or you can cofigure on your request such as TOUCH or WARNING facility)
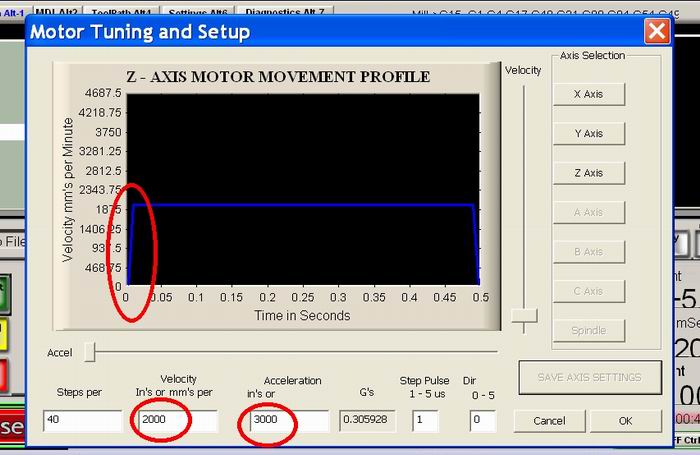
4.Config>Motor Tuning. Increase Acceleration value about 1.5 times greater (or more) velocity of Z axis.
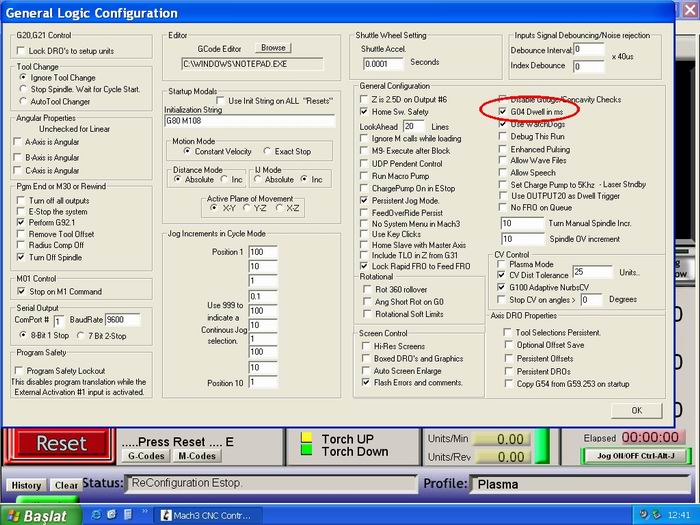
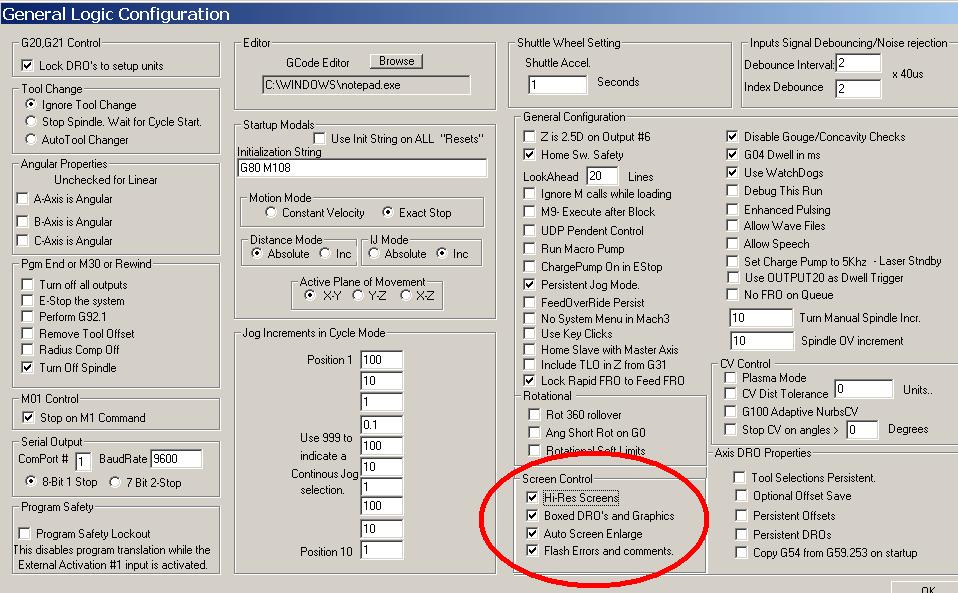
5. In GENERAL CONFIG section check "G04 Dwell.in ms" box
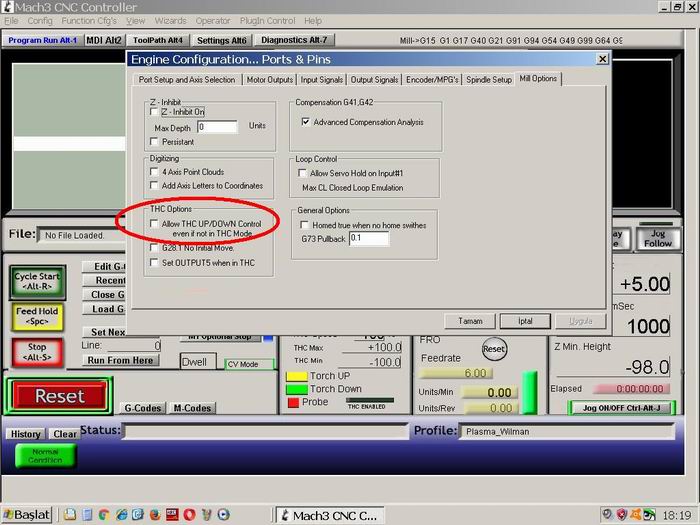
6. Configure THC Options Config > Mill Options > Un-check Allow THC Up/Down... option
7. Use our Plasma11 screen set Download ZIP file Important points are in circles.
8. Rename your M3. to M3org. Also copy and rename our M3*. file to M3.
****************************************************************************
Turkce Mach3 programı (Turkce yardim menusu) icin:
Mach3_Turkce ZIP dosyasini indirin
Turkce Mach3 Ekrani icin
Plasma11Trk.rar dosyasini indirin, acin. Plasma11Trk.set dosyasini C:\ Mach3 \ dizininin (Directory) icine kopyalayin. Mach3 u çalistirin Daha sonra View>Load Screen>Plasma11Trk yi secin.
MillBitmaps.rar dosyasini indirin,
acn M3.rar Makro dosyasini indirin, acin, C:\ Mach3 \Macro\ veya C:\ Mach3 \Macro\Plasma dizininin (Directory) icine kopyalayin. (Hangi Profil ismini kullaniyorsaniz oraya kopyalayacaksiniz. Ornek: Plasma1 ....veya sizin adlndirdiginiz isim.)
|
|
|
Contact: agelkom@gmail.com
|